Saturday, February 25, 2012

Thyme and Lemon Angel Food Cake with Strawberry Coulis


Wow...that title sounds fancy.  What's a "Coulis", you ask?  It is a French word for "thick sauce".    See!   Not so fancy after all. 


As for the cake, I thought I might have an original idea when I thought of this flavor combo, but alas and alack, this recipe was created by someone else. The Coulis is my idea though, so I feel a bit of originality here.


I've posted about Angel Food Cake before, under the title, "Let Them Eat Cake". As I said, Lee loves Angel Food and I'm glad because it is one cake I feel less guilty about eating, than others. The only fat in it comes from the egg whites. There is no other fat or oil. There's very little flour and sugar so the protein count is higher than the carb count.  Since I can't count, I have no idea what those numbers would be. I'm sure it's on the Internet somewhere.  


Here's the cake:


Ingredients~


1 C cake flour (very important...it is milled much finer than all-purpose)
1/2 C powdered sugar
10 egg whites, room temperature
1 tsp cream of tartar (this helps give volume to the egg whites)
1/2 tsp salt
3 TBL lemon juice
1 C granulated sugar
3 TBL stemmed thyme leaves
2 TBL finely grated lemon zest


Directions~


1. Preheat your oven to 350.


2. Sift flour and powdered sugar together.

Lumpy before...


...Smooth after.


3. Beat egg whites with a mixer (or if you want a Popeye arm, you can do this by hand with a whisk) at high speed until foamy. Add cream of tartar and salt. beat until soft peaks form.  


4. Beat in lemon juice, then beat in granulated sugar in 2 TBL increments, allowing each to become incorporated before adding the next.


5. Beat in thyme and lemon zest.


6. Fold flour mixture, by hand, into egg mixture with a rubber spatula. (Don't know how to fold? There are a ga-zillion how-to videos on YouTube!).


Spoon batter into an un-greased 10-inch angel food or tube pan.  Do not smooth or pat the batter down.


7. Bake for 35 minutes or until cake is lightly browned and springy to the touch. Invert pan, cool completely. (If you pan doesn't have "feet", you can balance the pan on a soda bottle).  Loosen cake from sides of pan using a narrow spatula or long knife.  Serve with Strawberry Coulis.


For the Coulis~
1/2 pkg frozen strawberries (about 1 1/2 C), thawed.
1/4C sugar
1/8 tsp almond extract


In a small saucepan, combine the strawberries and the sugar. Over medium high heat, bring to a boil, then transfer mixture to a blender. Puree until smooth. Add the extract and whirl a few seconds more.  Strain and let cool. Store in refrigerator for up to one week.


I know....it looks like I added some food coloring...but I didn't!

I strained the mixture into a squeeze bottle, but  if you don't have one,
 just strain it into a bowl and use a spoon to serve!
The aftermath...only one day later.  


Wednesday, February 22, 2012

Roasted Pork Loin with Veggies, Potato Mash and Reduced Balsamic Glaze


I was craving veggies and pork the other night, but needed to keep the budget LOW, and the flavor HIGH.  I ended up just throwing this meal together and was so happy with how it turned out that I thought I'd tell you about it.

I am notorious for over-cooking pork. But I decided to go against my pork-cooking fears and cooked it for less time than I usually do, and let it rest for 10 minutes. It was SO moist - slightly pink inside. Just perfect.  If you are as afraid of pork cooking as I was, here's an article on the newly revised pork-cooking temps by the FDA: Click here to see the article!  Just be sure the inner temp gets up to at least 145 degrees to be safe.

I'd never made a balsamic reduction before and didn't want to take the time of looking for instructions on the internet. If you decide to Google it, you may find that I did it completely wrong, but ignorance is bliss because the taste was divine over the pork and mash.

Now... as for the mash....if you have a mashed potato recipe you love, then go ahead and make it. I would say that I haven't yet mastered the mashing of potatoes....but these turned out purty darned good.


Here's what I did:

Ingredients~

For the roast:
olive oil
3 carrots, peeled and chopped into large chunks
3 parsnips, peeled and cut into large chunks
2 shallots, roughly chopped
1 yellow onion, cut into large chunks
fresh thyme leaves, removed from stems (about 2 sprigs)
1 small pork loin (plain - not pre-marinated)
2 cloves of garlic, minced fine
2 TBL dijon mustard
salt and pepper

For the side (obviously)
1 TBL olive oil
1 small head of broccoli, cut into slices

For the mash:
2 Idaho potatoes, peeled and cut into chunks
3 TBL butter for the mash
dash of heavy cream for the mash

1/2 C balsamic vinegar
1/4 tsp sugar
1 sprig of thyme left whole
2 TBL butter

Directions~

1. Heat the oven to 350, with the top rack in the upper third of the oven.

2. Rinse the loin and pat it dry. Do not cut off any of the fat! Season it all over with just a little bit of salt and pepper. Chop the garlic and thyme leaves at the same time, then mix that with the Dijon in a small bowl. Slather the loin with the Dijon/garlic/thyme mixture.


3. In a small roasting pan, drizzle a little olive oil (about 1 TBL), and put the loin in the middle of the pan (I think my pan was about 12 x 15). Put the veggies all around it and give them a  little salt and pepper.  Don't pack them in....you don't want them to steam.


4. Put the roast in the oven for 30 minutes.  When the timer goes off, take it out and cover the pan with foil and the loin and veggies sit for 10 minutes.

5. Get some water boiling and then put the potatoes in for about 15 minutes, or until you can easily slide a knife into them. When they are done, drain them in a colander and put them back in the hot pot off the heat. Add the butter and the cream, and mash until creamy (don't over mash or beat the life outta them or they will become like glue.    Icky.

6. Put the balsamic vinegar, sprig of thyme. sugar and just a PINCH of pepper in a saucepan and heat until it is simmering.  NOTE: Turn on the stove fan and keep your face outta the pan - trust me on this....it will take your breath away!). Let it simmer until it is reduced and syrupy, about 20 minutes. Afterward, take it off the heat, remove the thyme and gently whisk in the butter. It should be smooth and silky.

This is before the butter......

7. Heat up a large saucepan, on medium high. THEN, add 1 TBL olive oil and immediately add the broccoli. Cook, stirring a lot, until the broccoli has browned at the edges and is "al dente", about 5 - 8 minutes.


To serve, lay down some mash, top it with some sliced pork and balsamic glaze, put those veggies on the side and dig in!!


Sunday, February 19, 2012

Jam Sticks


Seems I have a bit of a sweet tooth lately. (LATELY?!!!!!). My friend Andrea Adams no longer calls me Cassie... she calls me "Sweet" (I call her "Savory" because she is such an amazing cook - I think I'll have to ask her for one of her recipes to share with all of you!).


As I was saying, I wanted a little goodie and so I got out my very old, very used, Betty Crocker Cookbook and found this wonderful recipe for "Jam Sticks". I had never been a big fan of jam until Lee took me to Laduree in Paris (there's also one in NYC!!) where I tasted my first macaron. It's my understanding that the macaron was created at Laduree....but I might be wrong. 


I digress. In the display case were jars of Confiture of Cassis, Framboise and d'Orange (fruit jam of Cassis, Raspberry and Orange) among other flavors. It's like eating fruit from a jar - nothing like the overly sweet jam you find here in the states. It....is.....divine.  So, of course, making JAM Sticks was my choice! (natch).


(NOTE: I made a 1/2 recipe but I will post here as Betty suggests).


Here's how you make 'em:


Ingredients~


1 C butter, softened
1 1/2 C confectioner's sugar
1 egg
1 tsp vanilla extract
1/2 tsp almond extract
2 1/2 C flour
1 tsp baking soda
1 tsp cream of tartar
1/2 jam (any flavor you like)
More confectioner's sugar for dusting


 Directions~


1. In a stand mixer or a hand mixer, combine the butter, sugar, egg and flavorings. Blend in flour, soda and cream of tartar just until mixed - do not over beat.  Cover and chill for 45 min to an hour.


2. Heat oven to 375.


3. Divide dough into 12 parts. Line baking sheets with parchment (or you can grease them instead if you don't have parchment).  Shape each part into an 8 x 1 1/2 inch rectangle on the pan (trust me....it's challenging to do it on another surface and then transfer - I tried it).  You can fit about 3 of these on each pan. With a wooden spoon handle, make a furrow lengthwise down the center of each rectangle. Spread 1 tsp of jam in furrow. Bake for 10 minutes. Cool on baking sheet for 2 minutes.  Carefully transfer to cutting area and cut diagonally into 1 inch slices.  Cool completely in racks. Dust with confectioner's sugar.


Enjoy!


Wednesday, February 8, 2012

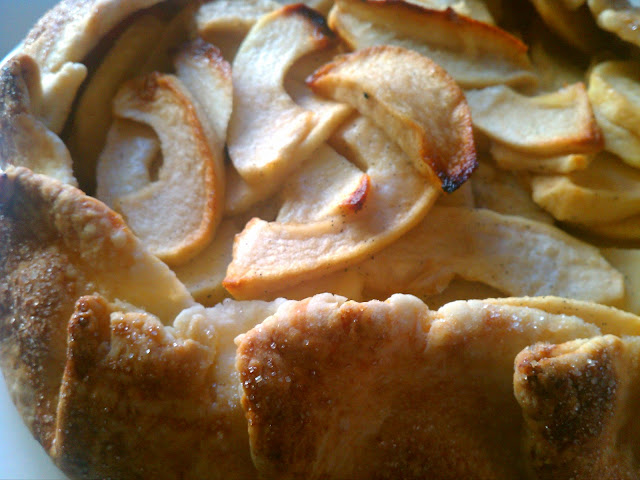
Vanilla Bean Apple Tart


"Some days, you just gotta have pie".  You may quote me.  However, if you're going to be technical and call me on the fact that this recipe is not a pie, but rather a tart, then I stand corrected. 


OH how I wanted an apple pie the other day......but I wanted something that would be ready a lot faster than a traditional pie, and also a bit lighter tasting. And this, my dear friends, is why I like to make rustic fruit tarts. They are easy and delicious.


This tart does not have a gooey, sugary filling, but a more fresh texture to the apples (which is what I prefer).  I decided to add the seeds of half a vanilla pod, with a capful of vanilla extract and POW! What fantastic flavor!


If you have a pie crust recipe that you love, go ahead and use it for this. But after experimenting with a pure butter crust, a 1/2 butter & 1/2 shortening crust, and a pure shortening crust.....I'm inclined to go with the pure shortening crust. It ALWAYS turns out flaky. My choice of shortening is a NON-Hydrogenated brand called "Spectrum". I found it at Pavillions, but I'm sure it's available anywhere now because people are finally getting hip to the fact that we are killing ourselves with hydrogenated foods! 


This crust recipe comes from my friend (and very fine drummer), Doug Mathews - who is a crazy good foodie type.


Ok...here's how you do it:


Ingredients~


(for the crust)
1/4 C warmed milk (not too hot!)
1 1/4 C flour
1 tsp sugar
1/2 tsp baking powder
1/8 tsp salt
6 TBL shortening


 (for the filling)
4 apples (I like Gala but you can use whatever kind you like)
1/4 C sugar
squeeze of lemon (about a teaspoon - not too much)
1/2 vanilla pod
1 capful of vanilla extract
2 TBL unsalted butter


a little milk for brushing the crust
2 TBL sugar (for the crust)


Directions~


PRE-HEAT oven to 400.


1. In a mixing bowl, combine the flour, 1 tsp sugar, baking powder and salt.


2. Add shortening, and mix with hands until crumbly and sandy. Add warmed milk, just until combined (you may not need all of the milk) and mixture forms a ball. Do NOT overwork the dough!


3. Form into disc between some plastic wrap and chill for about 15 minutes.


4. Peel, core and slice apples. In a bowl, combine apples with lemon juice, 1/4 C sugar, the vanilla extract and seeds from the vanilla pod.


I love using a melon baller to core apples. Easy!


Split the bean in half, lengthwise, and scrape out the precious seeds with the back of your knife.


5. Roll out the dough into a large circle (about 14 inches). I like to roll my crust on a silpat mat, with plastic on top, then transfer it, but if you have a way you like to do it - go for it!
Transfer the crust onto a parchment lined baking sheet.


6. Pile the apple mixture in the middle and begin to bring the crust over the apples, folding and creasing as you go around. 


7. Dot the fruit with the 2 TBL of butter. Lightly brush the edge of the crust with a little milk and sprinkle with the 2 TBL of sugar.


8. Bake for about 40 minutes. If crust begins to brown too much, cover the edges with some foil as you would with any other pie (as you would).


Let it cool a bit before devouring.


Enjoy!


Saturday, February 4, 2012

Hazelnut Meringue Cookies


Resistance is futile. (If you know where that quote is from, then live long and prosper). When the craving for a meringue comes upon you, there's no use resisting. So, I set out to make this recipe, which is entitled, "Hazelnut Meringues". The picture in the book looked nothing like mine when they came out of the oven. In fact, I almost threw the batter out and gave up on this recipe because I knew the egg whites weren't "whipped" as they should be for meringues. But, I followed the recipe and decided to make them anyway and WOW! Lee practically ate the entire batch of cookies (with a little help from me). They turned out to be more of a Macaron than a Meringue and that's why I call them a Cookie (does that make sense to you? because it does to me).


NOTE: The recipe calls for 1 1/4 C "blanched" hazelnuts. I'd never blanched hazelnuts before and pictured dumping them in some boiling water, as you would vegetables, for a minute or two, then rinsing. However, that didn't sound appealing so I scoured the Internet for nut-blanching options. Sure enough, to "blanch" nuts, means to remove the skins and the way to do it is this: in a 350 oven, put the nuts on a baking sheet and bake for 15 minutes. Then, take them out and put them in a towel, and cover them up. Let them rest for another 15. Then rub the nuts in the towel to remove the skins.  EASY.


Just outta the oven...

Beginning to rub the skins off...


et Voila!


Here's how to do it~


Ingredients

1 1/4 C blanched hazelnuts (6 oz) (if you don't have the patience to blanch and skin, go ahead and toast them for about 15 minutes in a 350 oven)

2 large egg whites, room temperature

1 C confectioner's sugar

kosher salt


Directions

1. Preheat oven to 350, with racks in upper and lower thirds of the oven.

2. In a processor, pulse hazelnuts until finely ground (pulsing is better than running the machine because there's less chance of it becoming hazelnut butter!). 


3. In a medium, heatproof metal bowl (or your stand mixer bowl), combine the egg whites, sugar and a pinch of salt. Set the bowl over, (not in) a pot with 2 inches of simmering water and cook, whisking constantly, about 3 minutes.  Remove bowl from heat and using an electric or stand mixer, beat on high until very thick and glossy, about 3 minutes.


4. With a rubber spatula, fold the hazelnuts into the egg white mixture.


5. Line 2 baking sheets with parchment paper. Using a small cookie/ice cream scoop, drop batter onto sheets, 2 inches apart.  (Or you can drop by heaping tablespoons).  Bake for 18 minutes, rotating sheets halfway through baking. Let cookies cool on wire racks. 


Enjoy!


Wednesday, February 1, 2012

Cranberry Orange Nut Bread


I opened my freezer the other day and looked in a couple of drawers that I tend to ignore. I probably should re-name one of them my "After Christmas, half-used bag of frozen cranberries drawer" because I had THREE half-used bags in there!  Not very thrifty, I know. But I wondered if anyone else out there does the same thing???


So I decided, natch, to make some cranberry bread.  Super Easy! and you don't need to defrost the beautiful burgundy colored spheres - just chop away and stir them into the batter.


Here's whatcha do:


Ingredients~


2 C flour
1 C sugar
1 1/2 tsp baking powder
1 tsp salt
1/2 tsp baking soda
3/4 C orange juice
1 TBL grated orange zest
2 TBL shortening
1 well-beaten egg
1 1/2 C fresh or frozen cranberries, coarsely chopped
1/2 C chopped nuts (I like walnuts or pecans)


Evidence!


Directions~


1. Preheat oven to 350.


2. In a medium sized bowl, whisk together the flour, sugar, baking powder, salt and baking soda. 


NOTE: I chopped the cranberries by hand instead of the processor because I didn't want the pieces to get too small. HOWEVER, they tend to roll around a lot at first and it can be a bit challenging to start the chop without them rolling of your chopping board. I put a couple of kitchen towels around my board and that kept the little jewels on board just fine.


3. Stir in the orange juice and zest, shortening and egg. (The shortening will be a bit "clumpy" at first, but just stir well).  Mix until well-blended. Then stir in cranberries and nuts.


NOTE: I like to toast the nuts just slightly, in a pan, then let them cool before adding them to the batter. They will cook a bit more in the bread, so don't brown them too much. Toasting them a bit brings out the wonderful flavor of the nuts.


5. Spoon into a greased or buttered 9X5 inch loaf pan and bake for 55 minutes, or until a toothpick inserted into the center comes out clean.  Cool on a rack for 10 minutes in the pan, then remove and cool completely before slicing.....if you can wait that long.


Enjoy!